Page updated: 29 March 2026
Add a Realistic light beam to a photo in Photoshop
This tutorial will show you how to add a realistic looking light beam to an image in Photoshop. .

Transform your images with a stunning, photo realistic light beam effect using this simple Photoshop tutorial. Whether you're adding shafts of sunlight through a window or dramatic spotlight rays on a subject, this step by step guide breaks it down using layers, the polygonal lasso, Radial Blur Smart Filters and blending modes. Perfect for beginners and designers alike, you'll learn how to create a realistic light beam in Photoshop quickly. No plugins needed and results that look completely natural.
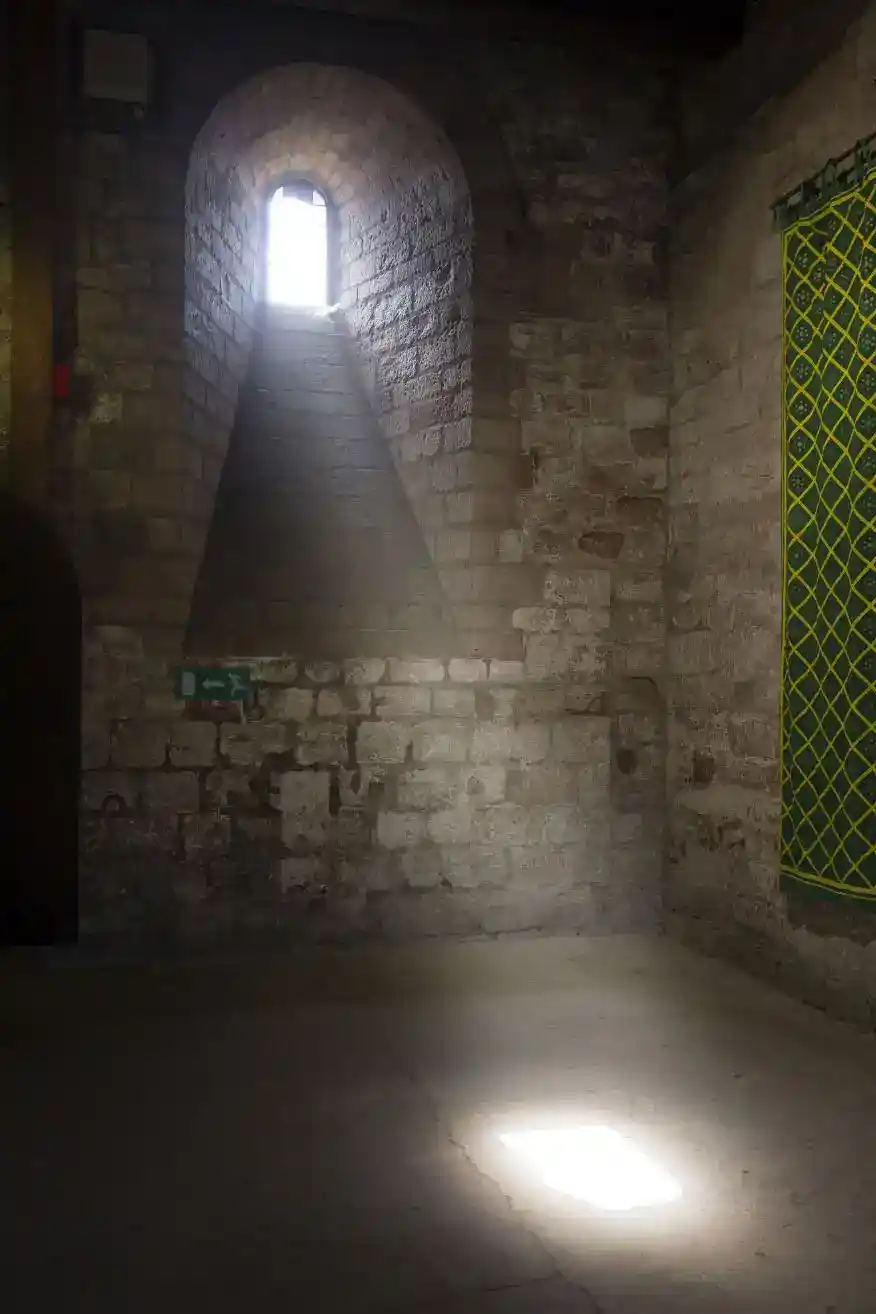
The original image was taken at Carlisle Castle, in the north of England, UK. Although there is no light beam, it looks like there easily could have been.
This tutorial will show you how you can easily add a realistic looking light beam and how you can edit the light beam for different effects.
Click on the buttons above the image to see these alternatives.
ON THIS PAGE
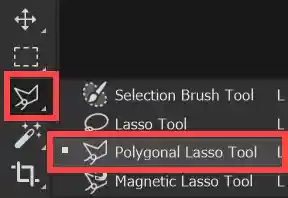
1. Select the Polygonal Lasso

2 Column toolbar
1 Column toolbar
Select the Polygonal Lasso tool from the toolbar.
This is the 3rd button on the toolbar and it shares the button with 3 other tools. The tool visible on the button, will be the last used tool.
This is a great tool for making selections involving straight lines. For more information see Polygonal Lasso.
2. Selecting with the Polygonal Lasso
With the Polygonal Lasso, click in the image to begin your selection. Here I have clicked at the top left of the small window.
Then click at the next point, top right of the window.
Then click on the floor, on the right, then the left.
Then click back up on the window and finally to complete the selection, click back where you started. You will see the cursor change shape, as shown in the video. The selection is then completed and will show as the "marching ants".
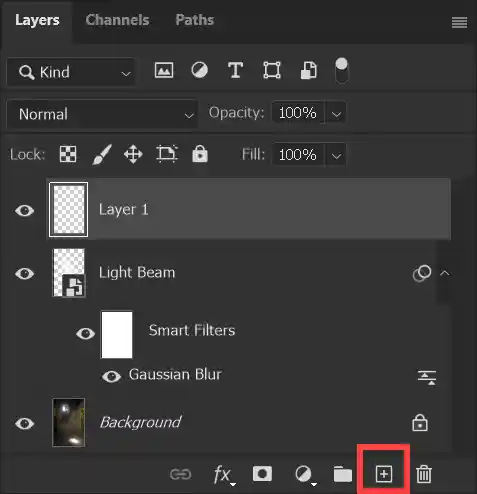
3. Add a New Layer
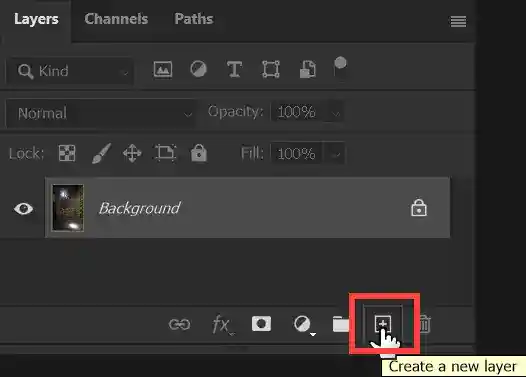
Add a new empty layer by clicking on the Create a New Layer button at the bottom of the Layers panel.
Or from the menu: Layer > New > Layer...
4. Fill Selection with White
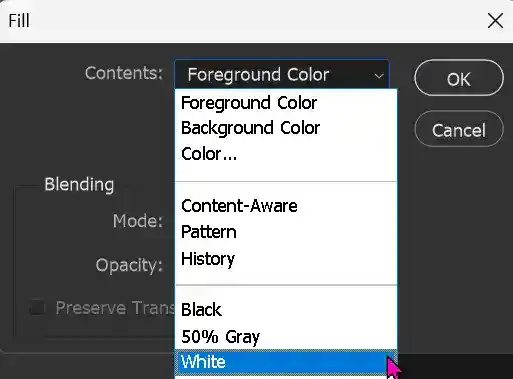
Ensure that the new layer is selected. From the menu: Edit > Fill > White.
5. Deselect

The selection is filled with white.
Deselect by pressing Ctrl+D, or from the menu: Select > Deselect.
I recommend you get used to using the keyboard shortcut Ctrl+D, because you will be using it a lot.
6. Convert to Smart Object


We will apply a Gaussian Blur filter to blur the white, but to enable us to be able to edit this in future, firstly convert the layer to a Smart Object. Right-click and select Convert to Smart Object.
Or from the menu: Convert for Smart Filters.
They both do exactly the same thing. Note the Smart Object icon in the layer thumbnail (red highlight).
7. Apply Gaussian Blur

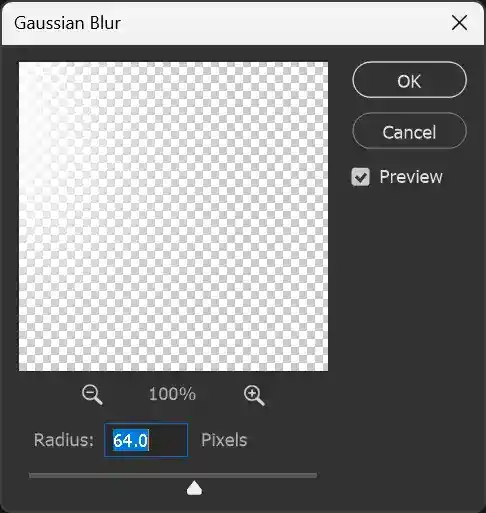
From the menu: Filter > Blur > Gaussian Blur.
Adjust the Radius Slider to achieve your preferred amount of blur. Here I have selected 64.0 pixels. This can be adjusted later, because you created a Smart Filter.
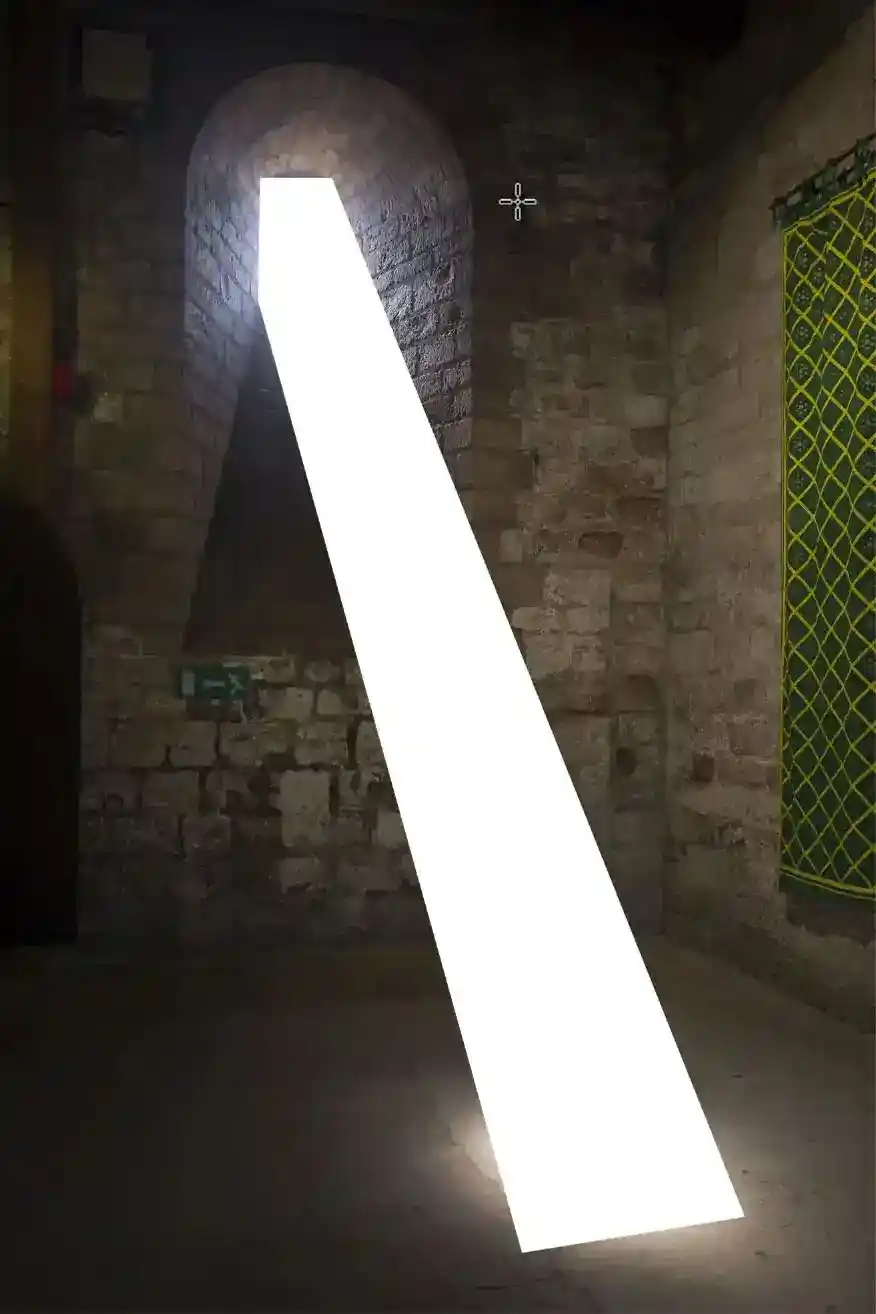
8. Blurred Light Beam
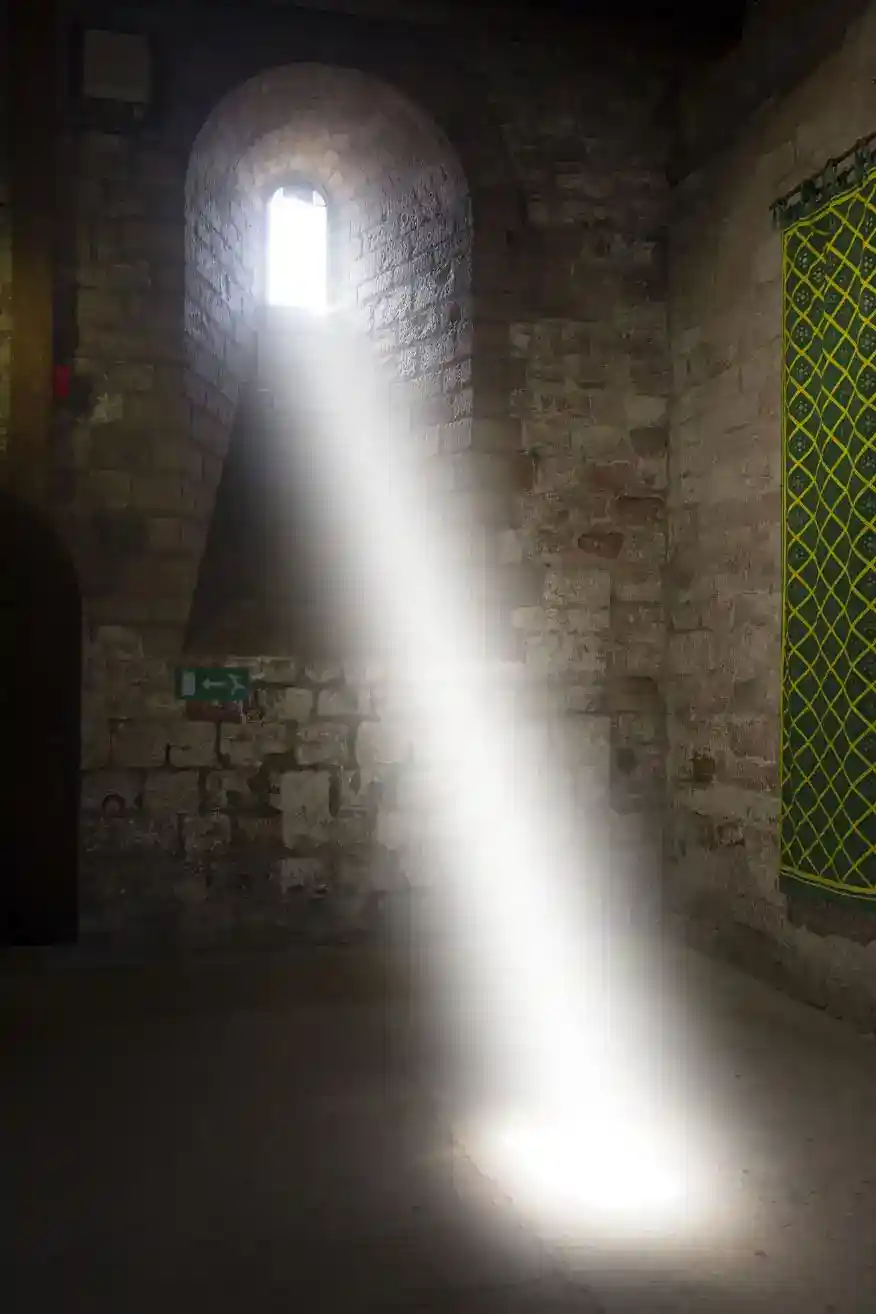
Your image should now look like this.
9. Soft Light Layer Blend Mode
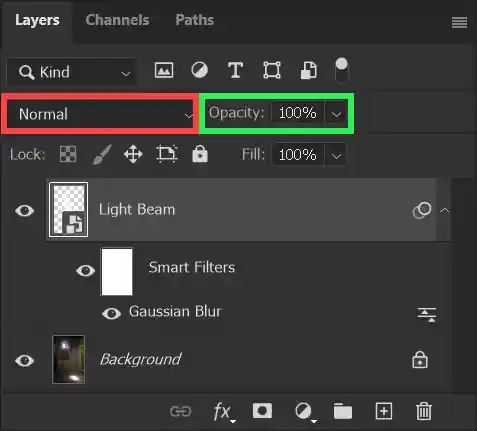
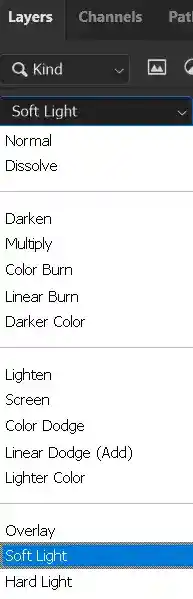
In the Layers panel click in the Blend Modes box (red highlight) to see a drop-down list of Blend Modes.
Select Soft Light.
An alternative would be to reduce the layer opacity for the Light Beam layer. Click in the Layer Opacity box (green highlight) and drag the slider to adjust.
Blend Modes allow you to achieve some results you can't get with other methods. For more information see Complete Guide to Blend Modes
10. Light Beam Options
The light beam looks realistic, so you could decide to stop at this point.
However, if you followed the above steps and converted the light beam layer to a Smart Object / Smart Filter, then you can go back and change the amount of blur, to achieve a different effect. Click on the buttons to see a few variations.
You can also adjust layer opacity to further change the effect. See the examples of Blur 16px and Blur 16px 50%, which shows the same blur at 50% layer opacity.
In the real world when you see this type of light beam, it often contains dust motes, illuminated by the shaft of light. Read on to see how we can replicate that effect.
Add Dust Motes to a Light Beam
11. Add a New Layer
Add a new empty layer by clicking the Create New Layer button (red highlight) at the bottom of the Layers panel.
12. Add Clouds Filter

Ensure the new layer is selected. From the menu: Filter > Render > Clouds.
There are no settings for this filter. There is no need to apply this as a Smart Filter because you can't edit it. If you don't like the effect, undo, then try again.
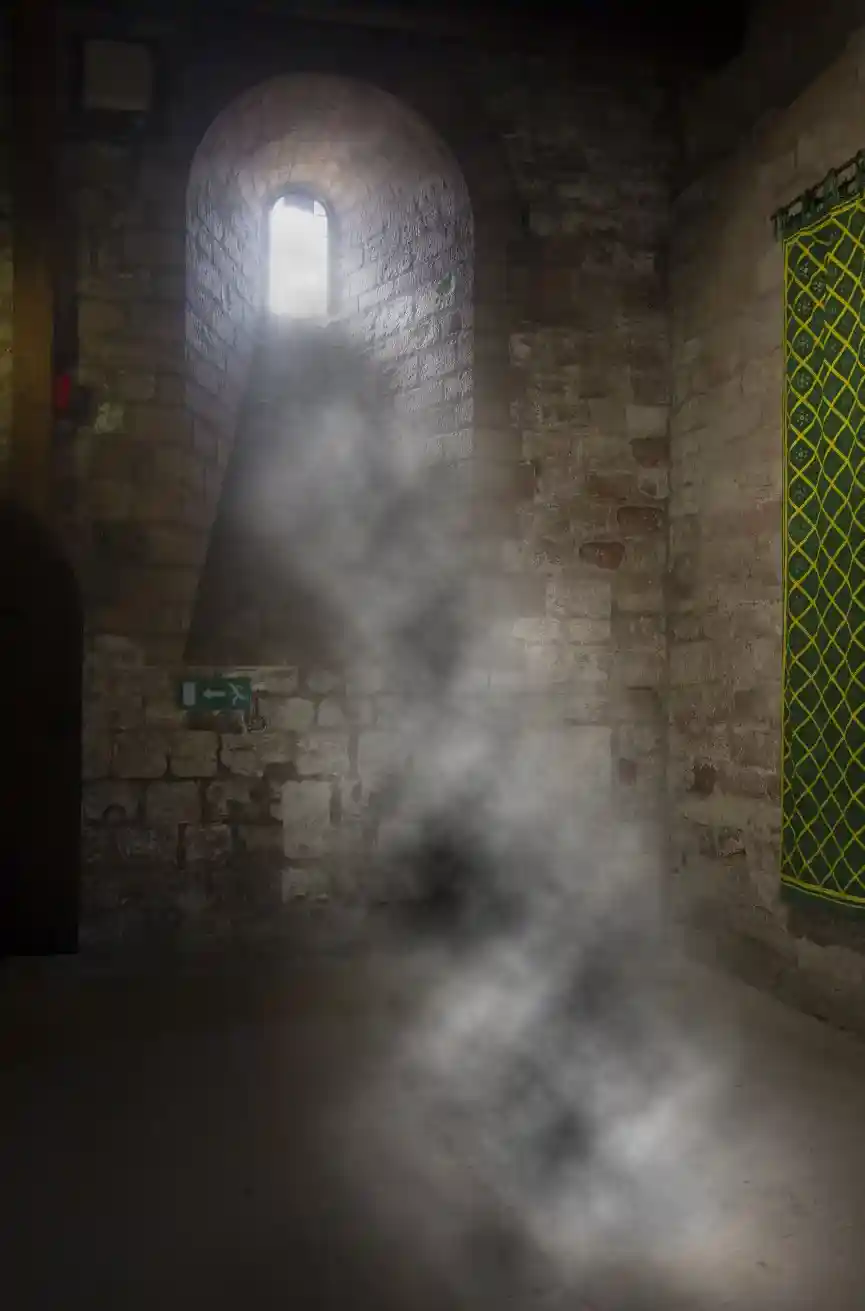
13. Cloud Filter Applied
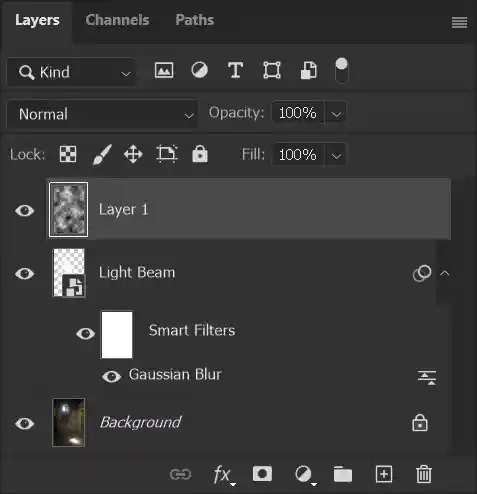
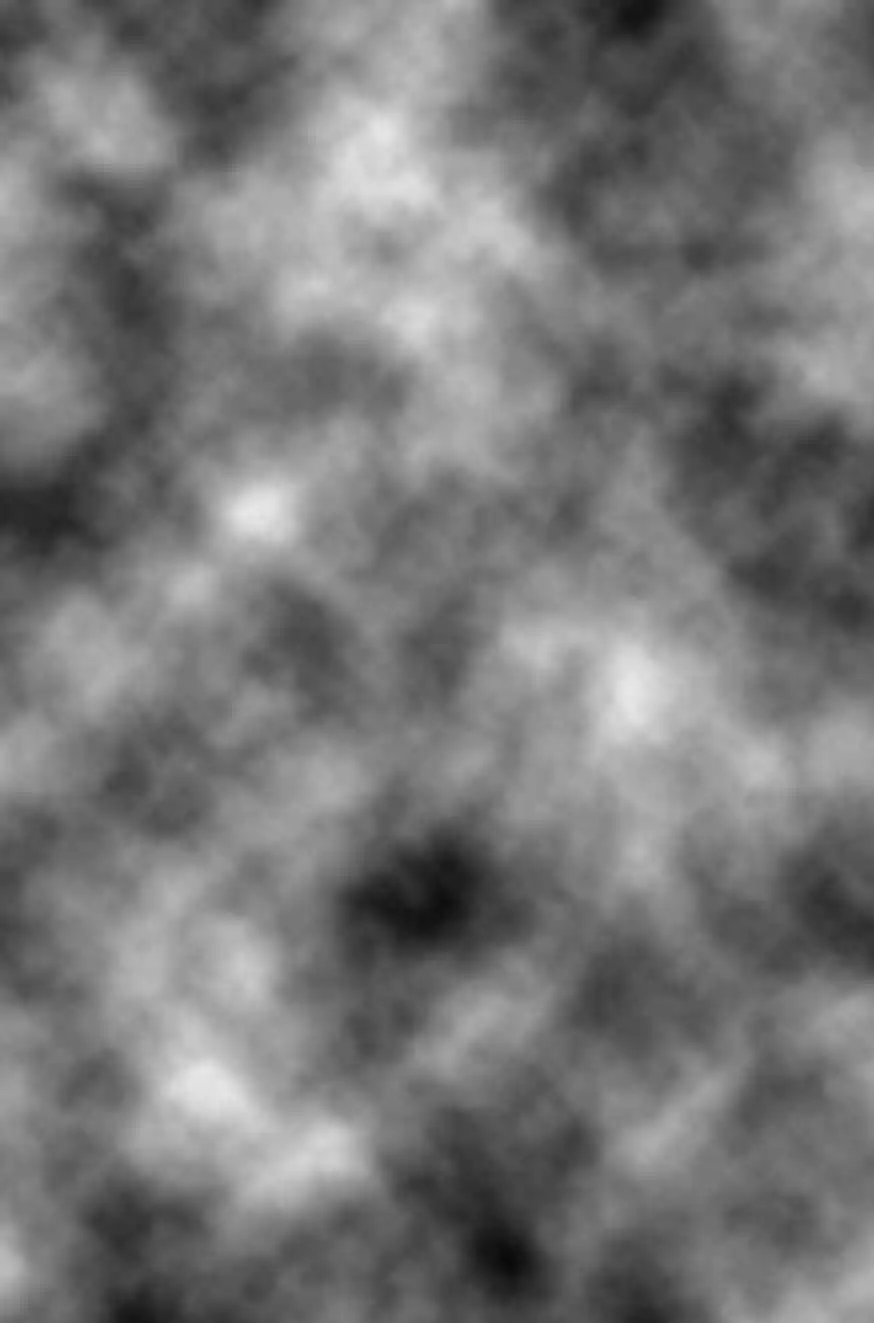
The layer is filled with clouds and will look something like this.
14. Make Selection of Light Beam


Ensure the clouds (Dust Motes) layer is selected.
Press and hold the Ctrl key and click on the layer thumbnail of the Light Beam layer (red highlight).
This is a great technique for making a selection of the contents of a layer and in this instance, it ensures that the clouds layer exactly matches the contents of the light beam layer, including the blur.
15. Add Layer Mask to Clouds Layer
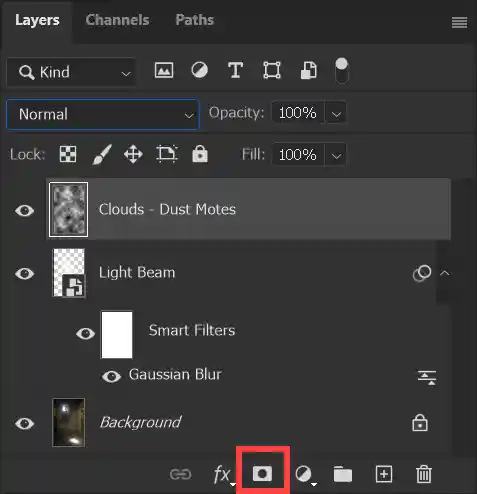
With the clouds layer selected and the selection active from the light beam layer, add a layer mask by clicking on the Layer Mask button (red highlight) at the bottom of the Layers panel.
The screenshot shows the result, with the clouds only visible in the light beam.
Layer Masks are essential and one of the most used tools in image editing in Photoshop. If you are not familiar with them, see Layer Masks.
16. Clouds Layer Soft Light Blend Mode

Click in the Layer Styles box (red highlight), in the Layers panel and select Soft Light (same as Step 9).
The green highlight indicates the Layer Mask you added in the previous step. The pink highlight indicates the Layer Mask button.
The Finished Image and Options
The light beam looks realistic, with a number of variations you can adjust.