Page updated: 24 March 2026
Paint Bucket Tool
Automatically Fill an Area with Color
The Paint Bucket Tool is used to fill areas, usually with color, but you can also fill with a pattern.
Often, it's simple to fill an area, if the area is empty or has one color or a limited range of tones. However if filling a more complex area, you will need to understand the Tolerance and Contiguous settings, which are described below, with examples.

Tap to view full size
Rotate your phone for easier reading
ON THIS PAGE
Tool Presets

You can create and save a Tool Preset for any tool, which will remember settings that you choose for that tool, so you can quickly and easily select different presets and settings for a particular tool. The degree of usefulness of presets varies, depending on the tool.
You can reset any tool back to its default settings by right clicking on the Tool Presets button and select Reset Tool. Take care not to Reset All Tools, unless that is intended.
Fill Source

Select whether to fill the selected area with the Foreground Color, or a Pattern. If you select the Pattern option, then you will need to select a Pattern from the second button dropdown list.
Source Mode

Choose to fill with a range of Blend Modes, for different effects.
If you use the Paint Bucket tool on a layer containing pixels, i.e. an image layer, selecting different Blend Modes will affect how that area is filled. It won't have an effect on an empty layer.
Opacity

When you apply the Fill, you can change the Opacity at which the Fill will be applied.
Tolerance
Tolerance controls how much of existing selected pixels will be filled. Pixels will only be filled if they are within the number of tones of the area where you click. A lower Tolerance will result in less of the area being filled, whereas a higher Tolerance will result in more of the selected area being filled.
Tolerance is the number of tones, lighter and darker, than the point on which you click with the tool.
Anti-alias
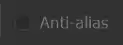


Anti-alias smooths out pixelated lines and edges.
Two circles were created with the Elliptical Marquee (press and hold Shift, while dragging for a circle), then both were filled with black. The top circle was created without anti-alias, while the bottom circle was created with anti-alias.
The bottom circles smoother than the top circle.
Anti-alias options exist in other tools as well. I recommend that where available, you turn on Anti-alias and leave it turned on.
Note that Anti-alias is only available for the Elliptical Marquee. It is not available for the other Marquee tools.
Contiguous

If Contiguous is selected, the Paint Bucket will only Fill selected pixels if they are touching other selected pixels, provided they are within the Tolerance setting.
Non-Contiguous means that any pixels, regardless of where they are in the image, will be Filled by the Paint Bucket, provided they are within the Tolerance setting.
All Layers
When All Layers is selected, the pixels that will be filled (depending on the Tolerance and Contiguous settings), will be calculated from all the layers. If you were using the Paint Bucket on an empty layer and had All Layers selected, it would take into account the other layers and only Fill, depending on Tolerance and Contiguous settings.
If you used the Paint Bucket to Fill on an empty layer and All Layers was turned off, it would fill the entire area.
How to Use the Paint Bucket Tool
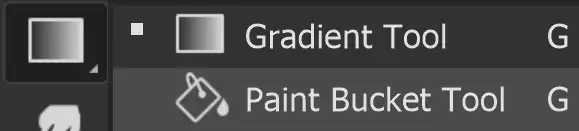
1. Select Paint Bucket Tool
Select the Paint Bucket tool from the Toolbar. It shares the button with the Gradient tool, so the tool that was last used will be the one that is visible.
2. Select Type of Fill
Select whether you want to fill with Foreground Color, or with a pattern. We'll start with Foreground Color.
3. Select Foreground Color
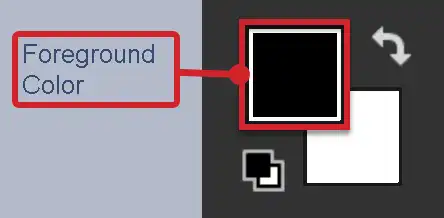
Select the Foreground Color. Click in the Foreground Color if you wish to change it. That will open the Color Picker.
For a detailed guide on both of these, see Foreground and Background Color and Color Picker.
4. Color Picker
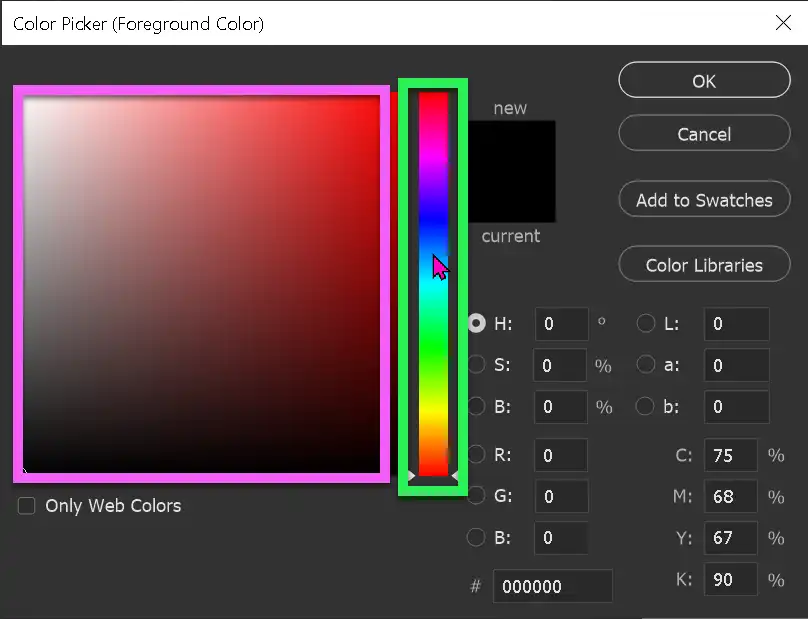
In the Color Picker, click in the Color Slider (highlighted in green) to pick a color. Then click in the Picked Color (highlighted in pink) to select a tone.
With the Color Picker open, you can also click outside the Color Picker, onto an open image, to select a color direct from that image.
Click OK to close the Color Picker.
5. Selected Color
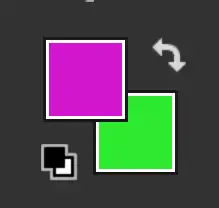
I have selected pink as the Foreground Color.
6. Click with Paint Bucket

I have a new, empty image. Just click with the Paint Bucket tool onto the image.
7. Fill with Foreground Color

The image is filled with the Foreground Color. The cursor (highlighted in green), shows where I clicked. In this image, with pure white, it does not matter where I click. In other images with more complex content, it does matter where you click, as detailed the the steps below.
When you click, the area that is filled will depend on Tolerance and Contiguous settings, as well as the layer (or layers) image content. The higher the Tolerance, the more pixels will be filled. If Contiguous is turned on, only pixels that are touching other selected pixels, will be filled. If Contiguous is turned off, all pixels that are within the Tolerance will be filled.
8. Pattern Fill with Paint Bucket Tool
Let's return to an empty document and fill with a pattern.
Select Pattern, instead of Foreground.
9. Select a Pattern
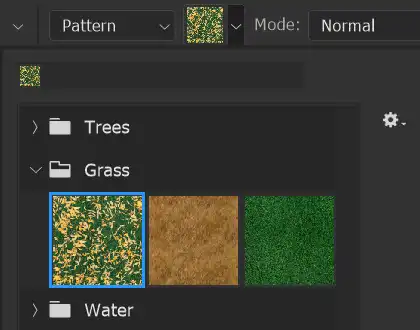
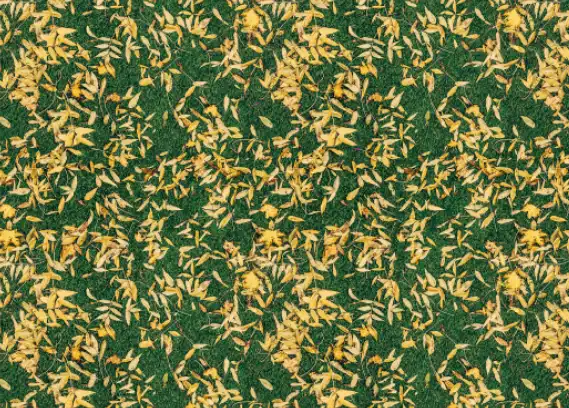
Now the Pattern button is available. Click on it to select a pattern. I have selected the first of the Grass patterns.
10. Layer filled with Pattern

One click and the layer is filled with the pattern.
The whole layer is filled because it was originally filled with a plain color, without any variation in tone or color. This means that all pixels were within the default Tolerance of 32. Whether Contiguous was turned on or off would not make a difference, because all the pixels are exactly the same color and are touching each other anyway.
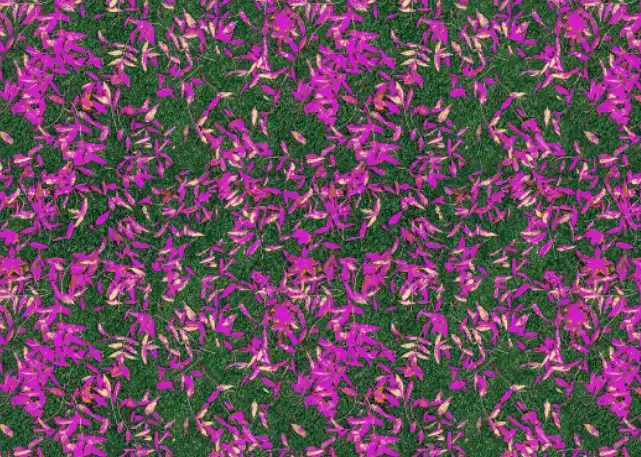
Now the layer is filled with multiple tones and colors. Let's see what happens if we try to fill with Foreground Color.
11. Tolerance and Contiguous Settings
All the green parts of the layer have been filled with the pink Foreground Color.
This is because the pixels were within the Tolerance of 32 and also Contiguous was turned OFF. In this image it makes a big difference if Contiguous is turned ON, as the next steps will illustrate.
12. Contiguous ON, Tolerance 32
Contiguous has now been turned on. That means that only pixels that are within the Tolerance of 32 (32 tones lighter and darker than were I clicked) AND are touching other selected pixels.
At first glance it looks like nothing has happened
Something did happen, but we need to zoom in heavily to see it. See the next step.
13. Results with those Settings

Very few pixels were filled with the Foreground Color of pink. This is because of the Contiguous setting is turned on. Only pixels that are touching other pixels that also are within the Tolerance, will be filled.
14. Tolerance 80
I undid the previous step and changed Tolerance to 80 (from its default value of 32). So now pixels will be filled that are within 80 tones lighter and 80 tones darker than the spot I clicked.
Contiguous is still turned on, so only pixels that are touching other selected pixels are filled.
The next step shows a close-up.
15. Close-up of previous step

This is a close-up of the previous step.
16. Try again
I have undone the last few steps. Let's try again, but this time select the leaves, rather than the grass.
This is the original pattern before we try to Fill with Foreground Color.
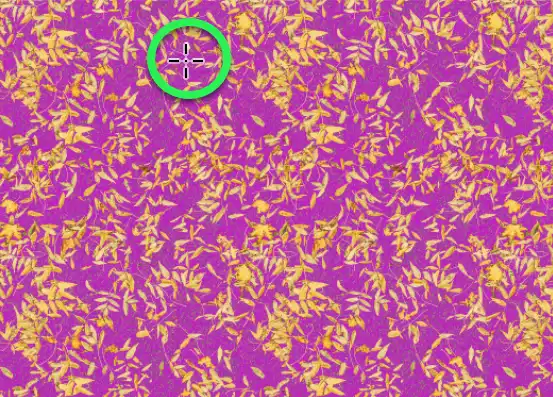
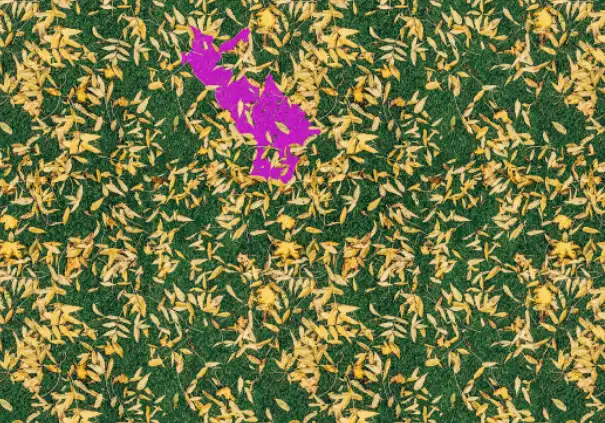
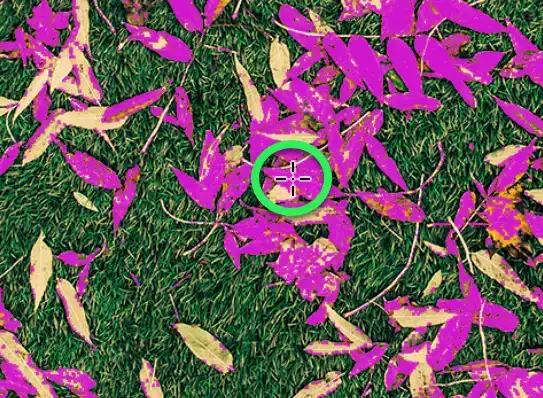
17. Contiguous OFF, Tolerance 80
This time I have clicked in two areas, indicated by the green circles.
Tolerance is 80 and Contiguous is turned OFF.
The amount of leaves that was filled, is quite different. See the next step for a close-up, to see clearly why this happened.
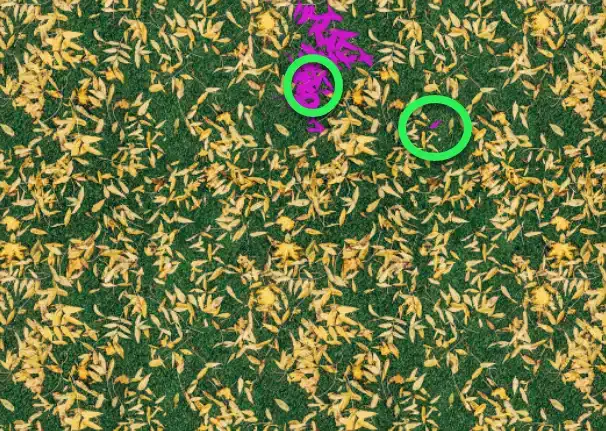
18. Close-up of previous step
This is a close-up of the previous step.
I have clicked in two places, but importantly, Contiguous is turned ON, so only pixels touching other selected pixels, are filled.
I only clicked once in each place, but the large area was selected because many leaves are touching each other.
The single leaf (near the bottom right corner) is not touching any other leaves.
19. Contiguous OFF, Tolerance 32
I have set Tolerance back to its default setting of 32.
Contiguous is turned OFF, so all pixels matching the Tolerance setting will be filled.
See the next step for a close-up.
20. Close-up of previous step
This is a close-up of the previous step.
The green circle shows where I clicked. At a Tolerance of 32, not all the leaves are selected, even though Contiguous is turned off.
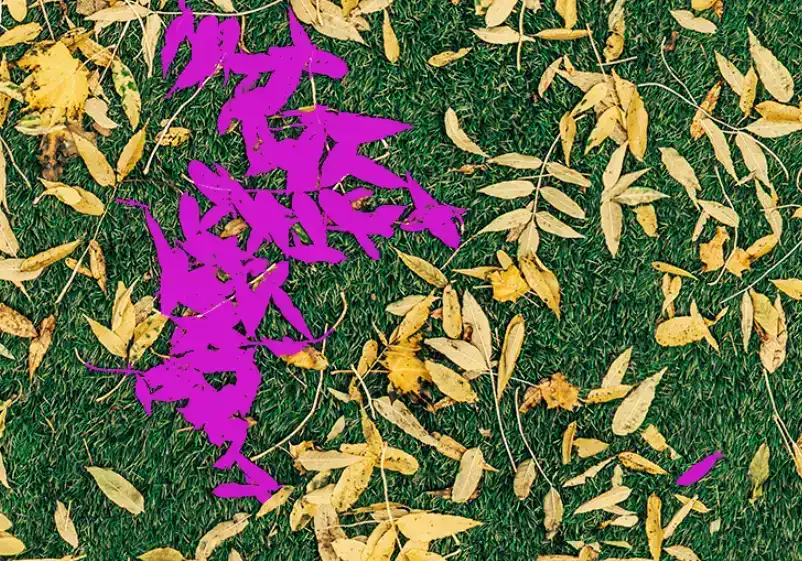
21. Contiguous OFF, Tolerance 80
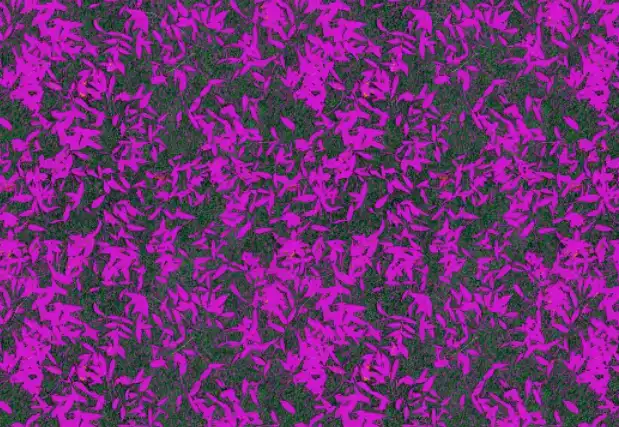
Tolerance has been increased to 80, as in earlier steps.
I have clicked in the same place as the previous step, on a leaf. Contiguous is turned OFF, so all the leaves are filled.
Also, some of the grass has been filled too, as it was within the Tolerance of 80.
See the next step for a close-up.
22. Close-up of previous step
This is a close-up of the previous step.
Virtually all of the leaves are selected, with the exception of a few very small areas. Some of the grass has been selected too, because of the high Tolerance setting.
Using The Paint Bucket Tool with All Layers
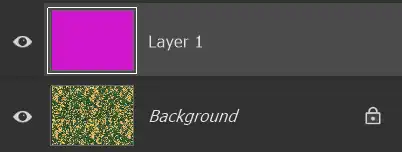
23. All Layers Settings
If you have multiple layers, the All Layers setting will make a difference to which areas are filled.
In this example, I've added a new empty layer above the layer containing the grass and leaves.
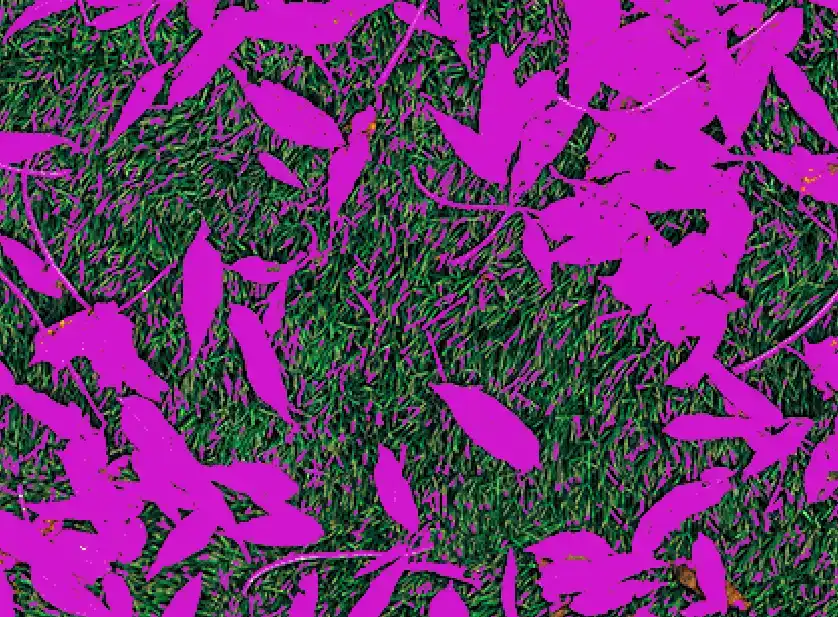
24. Contiguous OFF, Tolerance 80
The Paint Bucket tool has been used with the same pink Foreground Color, as in earlier steps.
Tolerance is 80, as above and Contiguous is OFF.
Although clicking on an empty layer, because the All Layers is selected, the Paint Bucket takes into account the content of all layers and only fills the empty layer as shown.
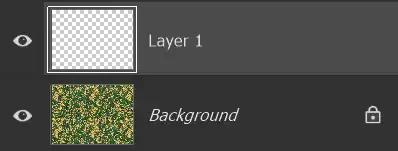
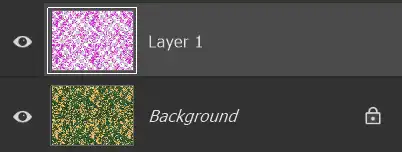
25. Layers Panel
This is the result of exactly the same Tolerance and Contiguous settings as the previous step.
All Layers have been turned off, so the Paint Bucket is only looking at the content of the empty layer.
Summary of the Paint Bucket Tool
The Paint Bucket tool is a fairly simple tool and often it's used to fill simple areas; areas that contain one color, or similar tones of a color. In those instances, it's use is easy and simple.
When you want to fill a more complex area, like the examples above of the grass and leaves, it's important to understand Tolerance and Contiguous and adjust these as required. This benefits from experience and sometimes also requires a degree of trial and error, to find the right Tolerance level.
Tolerance and Contiguous settings are worth getting to understand as they are also important settings with other tools, such as the Magic Wand tool.